
If you haven’t seen Stylo magazine you must go check it out, it’s full of stunning photography of kids clothes that you will never believe are all handmade. And guess who is featured in Issue 4!
I did quite a few looks for the magazine that I will blog about in the coming weeks, but first of all I wanted to share with you my favourite look of all.
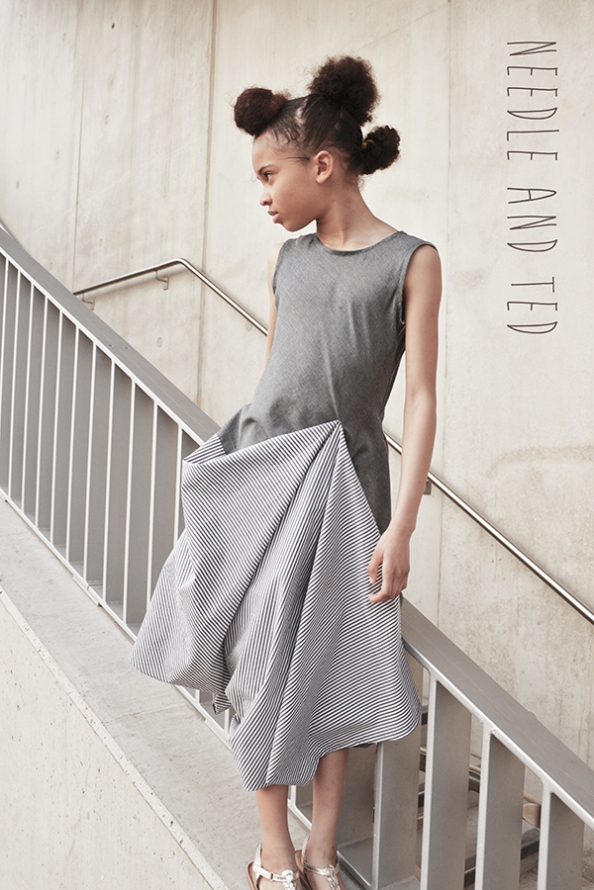

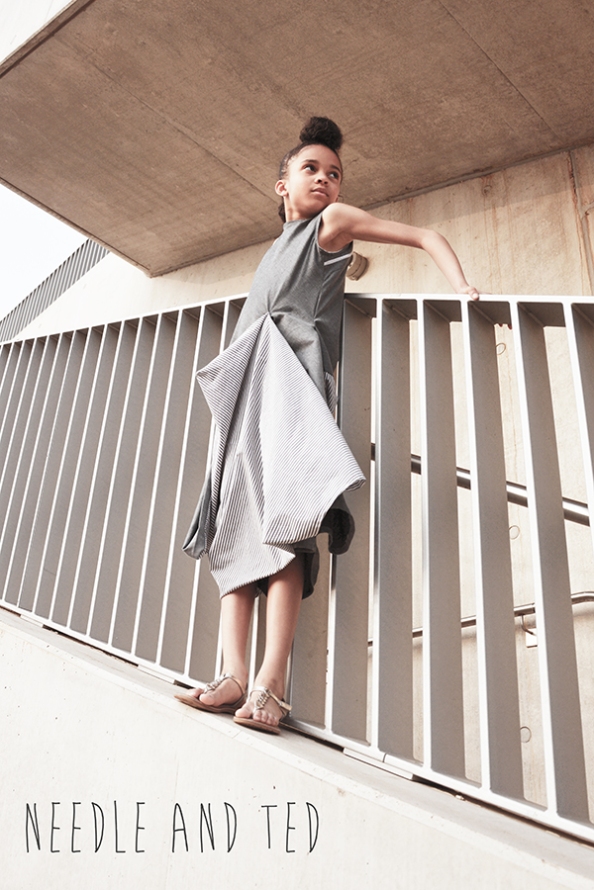
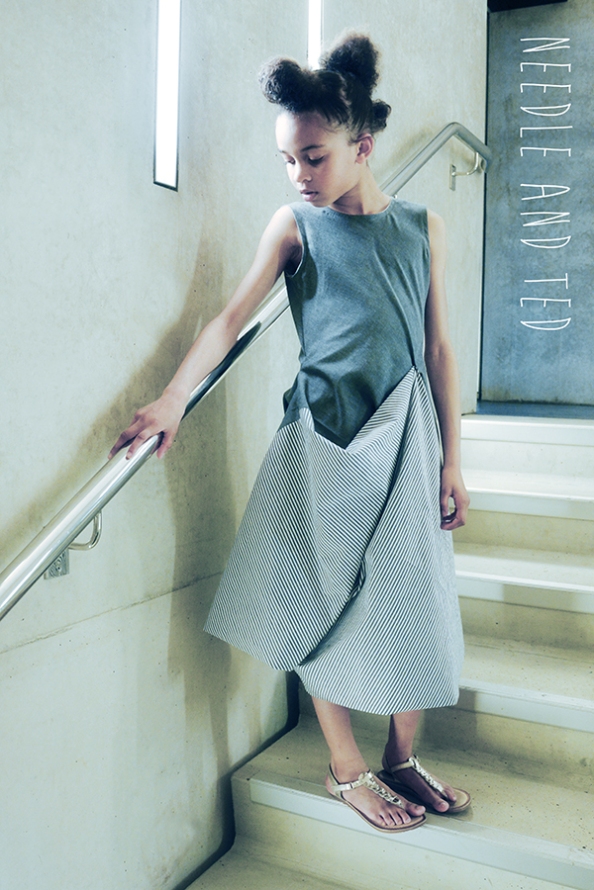
Not only do I love the dress, but Darcy worked the camera in a way I never knew she could and I think she looks stunning.
Don’t get me wrong, there were 194 other pictures where she didn’t look so good and retouching helped but the final images I am really proud of.


The theme for Stylo Magazine Issue 4 was high fructose, bold, bright and lively colours with modern geometric flair. I ignored the bright, bold, lively colours bit for the most part and focused on the geometric flair.

The carefully considered location of the shoot was the London Aquatic Centre. Chosen because of it’s geometric shapes and impressive 628 panes of glass allowing in lots of natural light.

But Darcy had other ideas and she wanted to use the whole building, she was having fun and wanted to explore.

The decision to make a subtraction dress was very last minute. I was looking over what I had made during the long April nights where sleep became irrelevant and I was happy with everything I had made but like on the Great British Bake Off I wanted to make a showstopper. And it was fitting that I did it at the end, when I had very little time left and I was thoroughly exhausted from lack of sleep.
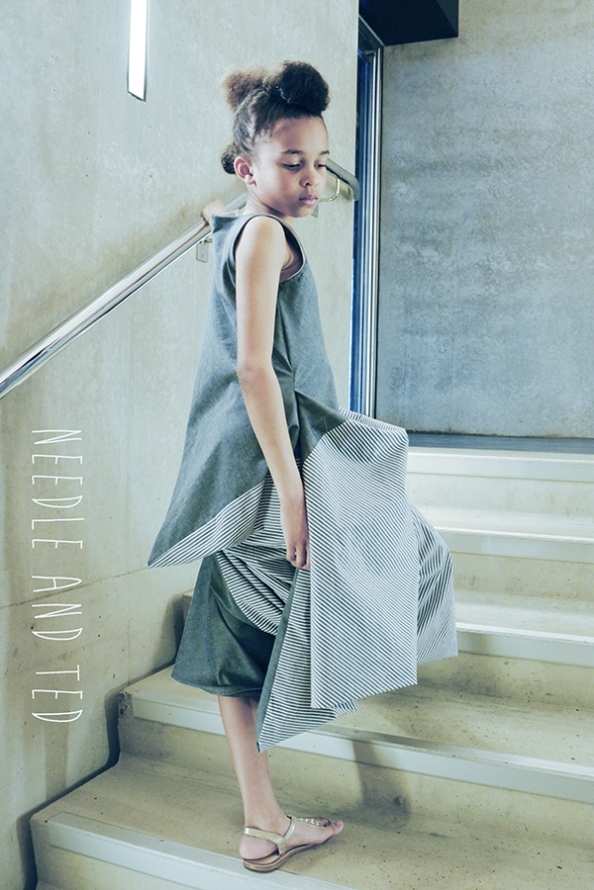
The Subtraction Cutting technique was invented by the British fashion designer Julian Roberts, an experimental method of making hollow shapes that allows for surprise discovery.
When I first saw the video over a year ago I immediately had to try it out. And by immediately I mean the very next day. The method breaks all the ‘rules’, it’s simple, fascinating and innovative. When you see it you’ll want to make one as well. I’ve done a tutorial at the end, just incase you don’t have time to watch the video.
I have a number of similar(ish) asymmetrical dresses from All Saints, and to think I could make one myself, in just a few hours but with better quality fabric and for a fraction of the price, had me excited beyond measures.
It is now laughable to think that the All Saints parachute dress took 75 hours to create.
You can learn Subtraction Cutting very quickly. Here’s my little tutorial that I hope will inspire you to make a unique version of your own.

You will need:
For a child version: 2 fabrics, about 1 m of each
For an adult version: 2 fabrics, 2-3m of each
There are no exact measurements or rules, you can use knit or woven, take into consideration how it will drape, experiment, be free, have no constraint.
1
Lay your fabrics on top of each other, right sides together. Stitch all the way round leaving an opening down one short end like a duvet cover. Turn right side out.
2
Using the front and back of a bodice pattern as your paper template, chuck each one down carelessly towards the closed end of your duvet cover. The back bodice should be above and the front bodice below, positioned randomly. But remember there are no rules, so if you want to do it differently, go ahead.
3
Using chalk, draw round each bodice leaving out the bottom edge.
4
Join up the bodice front to the bodice back by drawing a loop from one open end to the other (see illustration). Repeat for the other side.
5
Cut away the negative space that you have just drawn. Only cut through the top layer.
6
Turn inside out. Join the shoulders and stitch together. Join the sides and stitch together.
7
Turn the right way round, hold it up and admire.
8
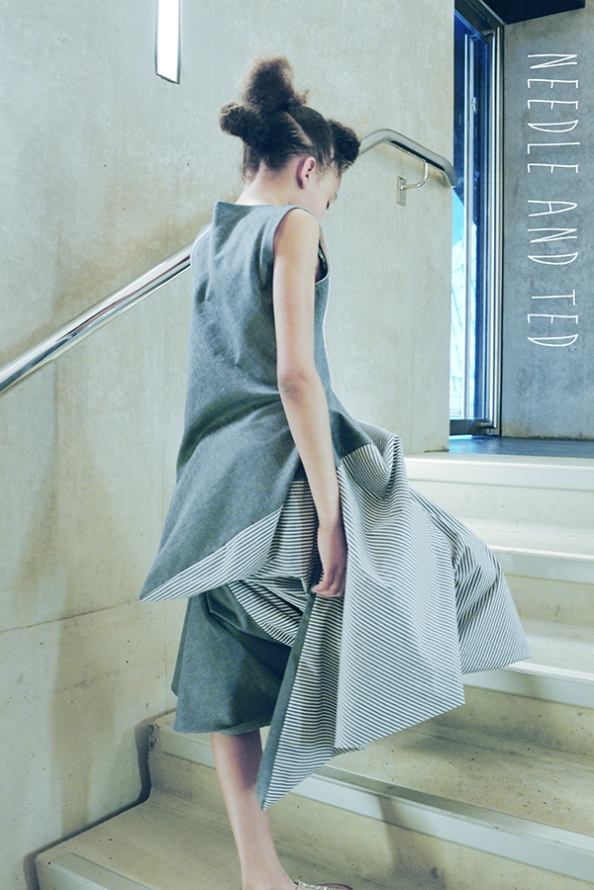
Now for the fun bit. Try it on and get creative. Hitch, sew, twist, cut, sew, hitch, join. Do whatever you like until you are happy with what you have created.

Finish off by using facing or binding, what ever you like. Add a closure, darts. It’s all up to you. Be creative.
I put my zip in at an angle in keeping with the angles of the dress, the theme and the location. It’s all in the detail 😉
Well, will you be making one?
If you do make a subtraction dress, I would LOVE to see it. Send me an email, tag me on Instagram or leave a comment below to direct me to your blog post.
I have been considering making one for my 3 year old. What do you think? Is she too young for a subtraction dress?
Exciting news
I was honoured today to receive an email by the man himself, Professor Julian Roberts. How he managed to stumble upon my little blog I do not know. But I am so pleased that he did, it made more than my day.
The email read…
Hey!
Just wanted to say i love what you have done with Subtraction Cutting, and also that i love what you’ve done without it!!:)
It’s interesting for me to see Subtraction Cutting childrenswear because the majority of students i’ve taught at colleges focus on womenswear, or very occasionally menswear, but rarely childrenswear, which can be equally creative (and perhaps more fun/fulfilling too for mum/dad-designer-makers who can perhaps also involve their child in the making process, and design in a more collaborative caring/empathetic/educational way).
Your madeit-patterns is very slick and cool looking too, and i like the grey’s and the more sophisticated colour palettes that aren’t dominated by the usual divisive pinks and blues, or cartoon primaries. I wish you lots of good luck with it!!
Would you mind if i posted a few images on my Subtraction Cutting facebook page and tumblr website that link to your Needle and Ted / Madeit-Patterns websites?
Great work, keep it all going!
All the very best,
Julian
This has got to be THE highlight of my blogging/sewing adventure. I am beyond flattered.

Definitely a show stopper! I loved all the color in this Stylo, but your lack of color is even more dramatic. Beautiful. I’m off to chop up some fabric…
LikeLike
Wow, thanks for sharing how you did this. Definitely getting added to the “must try” list.
LikeLike
Meant to ask – were there raw edges at some parts of the bottom? At what point did you hem/finish them? Thank you!
LikeLike
After I joined the shoulders and the sides I tried it on my daughter, shortened it in a few places before I hemmed.
LikeLike
The dress is AMAZING, definitely mind blowing!
LikeLike
Thank you Janette xx
LikeLike
Thank you Rita. 😊
LikeLike
Excellent Olu! I’m very impressed! Janette
LikeLike
Amazing! I’ve to try this for myself. You explain it so well, it almost looks so easy!
LikeLike
Diana it is very easy. You must try it.
LikeLike
this is incredible! I’ll definitely be making one for myself and one for little Eddie!!
LikeLike
Looking forward to seeing it 😊
LikeLike
Wow! This dress is all sorts of amazing! A show stopper for sure!
LikeLike
Thank you Olga 😊
LikeLike
So interesting and creative! Thank you for sharing about how you made your incredible dress.
LikeLike
This is so interesting and I can’t wait to try it for myself. I think what you did in keeping the bodice side seams long for your little model was a great plan, so she doesn’t seem swallowed by what can be a rather voluminous result. (I’ve been looking at subtraction cutting pictures and videos since seeing your post about it here, and the results can be gloriously overwhelming!)
LikeLike
Thank you, it was a risk making one for a child, it could have looked ridiculously over the top, but it turned out well by making it a shorter length. Would love to see yours after you’ve made it.
LikeLiked by 1 person
This is amazing!!!
LikeLike
Thank you very much
LikeLike
When I first saw this, I thought that it looked amazing that that it was so far out of the realm of possibility for me to try. Now that I’ve taken the time to actually think through your great tutorial, I MUST try this! I want a subtraction dress for myself!!!!
LikeLike
You absolutely must try it, and when you do, you absolutely must show me 😉
LikeLike
Pingback: DISGUISE: hiding in plain sight | kids clothes week blog
This is lovely, thank you so much for posting instructions! Can you please let me know if the zipper is necessary or can be done without it?
LikeLike
Thank you Danijela. The zipper is not necessary, however without one you just need to make sure that the opening is large enough to fit over the head. Knit fabric is more forgiving.
If you make one, I would love to see.
P.S. I hope you are not afraid of zippers. Be fearless! 🙂
LikeLike
I MUST and WILL make one! Adult sized. This is the most amazing AMAZING dress!!
LikeLike
Oh you definitely should Trudy, I know you will look amazing.
LikeLike
Doing a ladies version with bust darts would you recommend the front be the bottom bodice you draw and the back the upside-down upper? (hope that makes sense!!!)
LikeLike
You can do whatever you like, there are no rules, just experiment and see what happens 🙂
LikeLike
I did it. Made a big person one. Then cut off the bottom and made a top. 😦 I did 2.5 metres and I was completely swamped in fabric and looked nowhere near as awesome as your daughter (which really goes without saying since she looks like a seriously stylish young lady). I may try again…
LikeLike
This is great but why has no one posted any of their creations?
LikeLike
I don’t know Marie but you can find quite a few if you Google ‘subtraction dress’ 🙂
LikeLike
I made a dress after being inspired by what you did for your daughter. My granddaughter was 3 when you blogged about it and I had to keep it in my mind until a few months ago when she was 5. Here is a link to the dress I made her thanks to your help: https://yearoflivingdisney.wordpress.com/2017/08/28/bibbidi-bobbidi-boutique-remix/
Thank you again. It was really fun to make this dress for her.
LikeLike
Oh wow! That’s so lovely to hear. I’m off to check out your version.
LikeLike
Pingback: Bibbidi Bobbidi Boutique Remix | A Year of Living Disney
super schön
LikeLike
Thank you very much Mathilde 😊
LikeLike
Cool..but it is hard for me to undeestand ur pattern…can u make video tutorial if u dont mind…plz…
LikeLike
As luck would have it, Tree at Stitchless tv made a video of the technique. Check it out https://www.youtube.com/watch?v=DBqtJr1oGd0
or you can watch Julian Roberts video here: https://www.youtube.com/watch?v=dZmozKVdvBo
LikeLike
Cool..but it is hard for me to undeestand ur pattern…can u make video tutorial if u dont mind…plz…tq
LikeLike